Email: office@boldimaging.com
Phone: 647-229-2369
How To Remove Builder's Mirrors

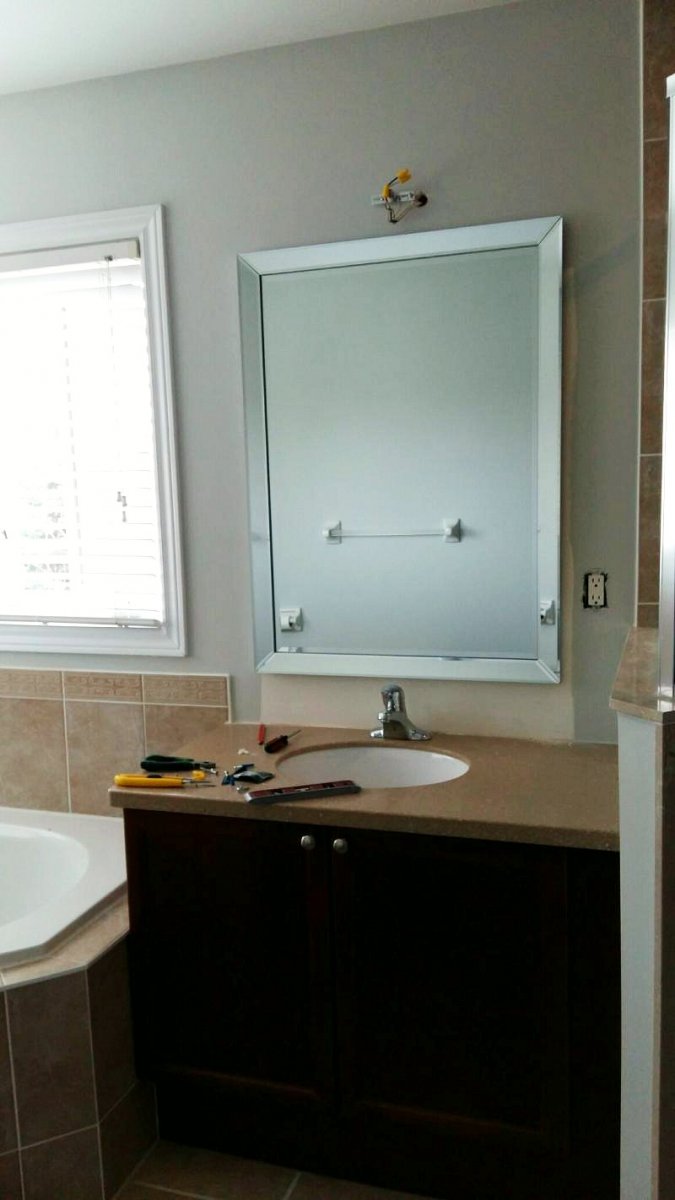
Few things make as much of an impact in a bathroom as proper lighting and a beautiful mirror (assuming the fixtures are up to date of course).
But standard unframed builders mirrors generally do nothing for space.
With some safety precautions and a little effort though, builder’s mirrors can be effectively removed. And our ongoing and latest (BIG) project we got the chance to do exactly this! So we thought we could bring you along and take this chance to share with you how to effectively remove builder's mirrors!
To Remove a Builder's Mirror You Will Need:
Heavy Duty Packing Tape
Wooden Shims
A Pry bar
Safety Glasses
Work Gloves
Shoes (do not handle glass in bare or sock feet)
Long Sleeves
Flathead Screwdriver (and possibly a Phillips head as well)
Putty Knife
Spackling Compound
Paint (for possible touch ups - if installing smaller mirror)
Tarp/Sheet/Plastic
A Friend (this is much easier and safer to do with two people and of course if the mirror is large - the only way to do it)
Directions:
Step 1:
Remove any lighting that may overhang or impede the removal of the mirror.
Step 2:
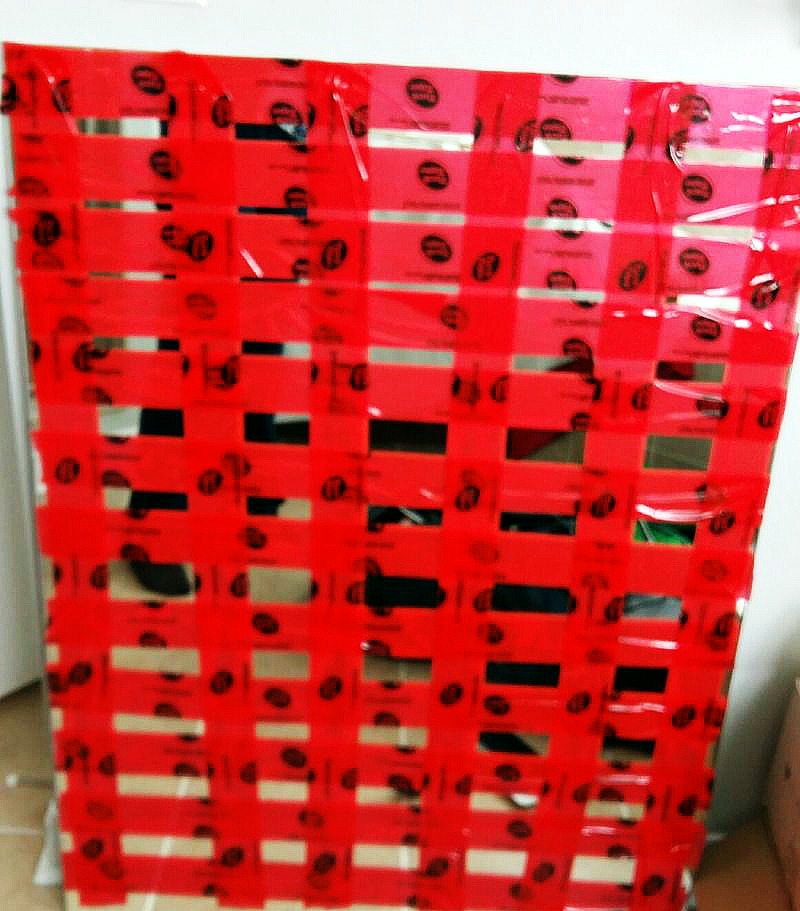
Tape off the entire mirror with heavy duty packing tape. Be generous - the more the better. This is important! It will help to prevent cracking and breaking, as well as prevent shattering if a break does happen. Do not attempt to take a glued on mirror off the wall without doing this first.
Step 3:
Protect the vanity and sink. Use a drop cloth or sheet to cover and protect the area.
Step 4:
Put on appropriate safety wear - safety glasses, long sleeves, shoes and work gloves. Proper eye and hand protection and footwear is very important when dealing with glass. So be prepared to work with broken glass - just in case.
Step 5:
Detach or pry off any edge or corner pieces holding the mirror in place.
Step 6:
With a pry bar, used with a wooden shim to protect the wall, start gently prying and tearing the mirror loose. Work a little at time and go slowly, working your way around the mirror, until loose from the wall. This is where a second set of hands comes in helpful, they can brace the mirror at the bottom, so that the mirror doesn’t come loose and fall (if a pry bar won’t fit a wide putty knife might get you started).
Step 7:
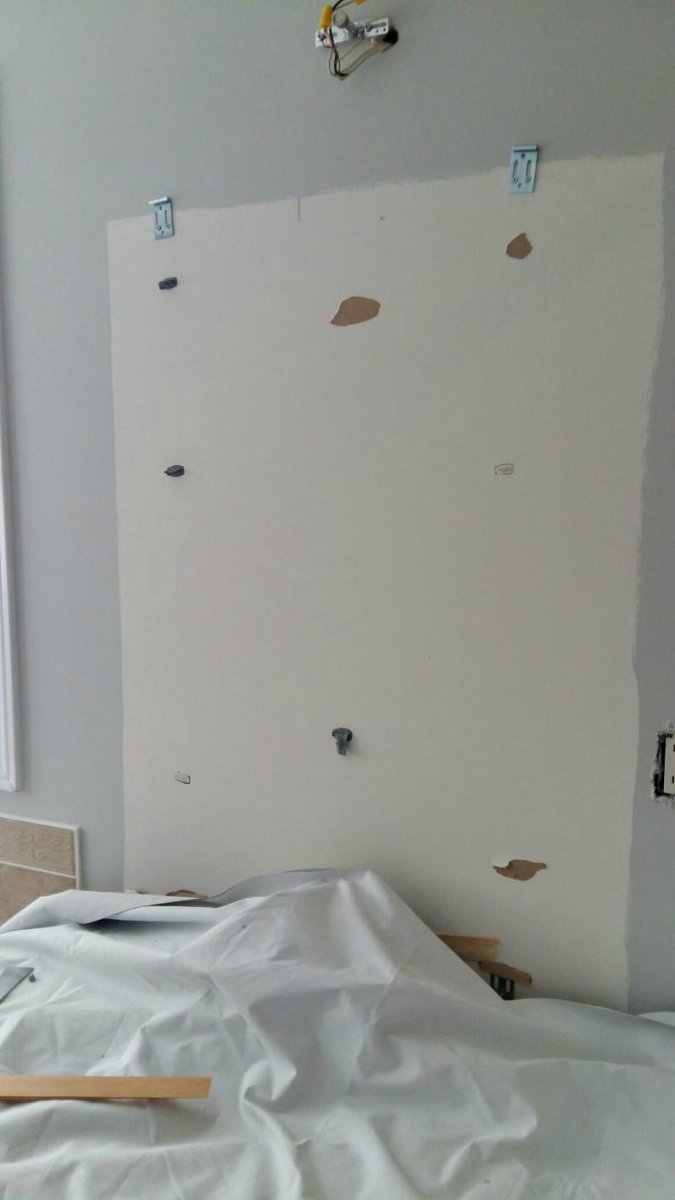
Once the mirror is detached from the wall, carefully lift down and properly dispose of or repurpose.
Step 8:
Using spackling compound and a putty knife repair any damage to the wall. Allow to dry.
Step 9:
Sand and paint if needed, especially if being replaced by a smaller mirror that might show any glue damage. Allow paint to dry.
Step 10:
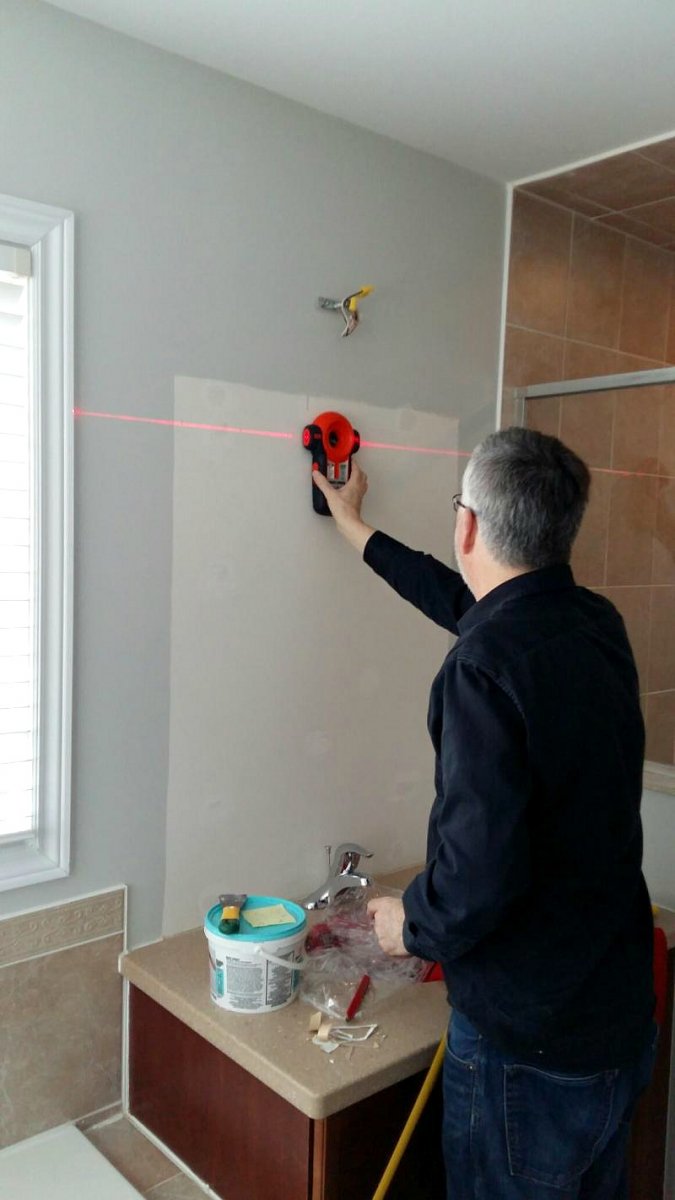
Use a stud finder and proper hardware to install the new mirror. Making sure to measure and mark ahead to ensure it is properly centred.
Step 11:
Step back an enjoy your handy work.
Make sure to check back for more details and follow along as our large project unfolds!!
![]()
Bold Real Estate Imaging offers Professional Virtual Tour Photography, HDR photography, HD Video, Home Staging, Feature Sheets and Floor Plans. Variety of packages available.
Our areas of service include Toronto, Mississauga, Brampton, Oakville, Burlington, Milton, Georgetown, Cambridge and Guelph. Call us to see if we service your area.
© Copyright BOLD Imaging Inc., 2011-2020. All Rights Reserved. Site developed by LiquidCMS